Ever tried to cook chicken breast and ended up with a dry, rubbery mess? Me too. Until I discovered the magic of the Dutch oven! I still remember the first time I made Dutch oven chicken breasts—it was a chilly Saturday, and my friend Lisa had just raved about her “game-changing” Dutch oven. I wasn’t convinced at first, but wow, this thing lived up to the hype! By the end of dinner, my family was practically fighting over the last piece. So let’s dive in and talk about why this recipe is about to become your new go-to.

Why You’ll Love This Recipe
Perfect for Comfort Food Lovers
This recipe is like a hug in culinary form. The chicken comes out succulent, the veggies tender, and the broth brimming with flavor. Imagine the cozy satisfaction of a slow-cooked brisket, but faster and simpler. Whether it’s a dinner party or a solo treat, this dish feels like a special occasion without the fuss.
Great for Busy Families
We all know life gets hectic. This recipe is perfect for feeding a crowd or meal prepping for the week. Make a big batch, and you’ve got dinner for tonight and leftovers for tomorrow’s lunch. The Dutch oven practically does the work for you—set it and forget it (mostly).
Made for Dutch Oven Enthusiasts
If you’ve invested in a Dutch oven, it’s time to put it to good use. This recipe takes full advantage of its even heat distribution and moisture retention. The result? Chicken so tender, you’ll wonder why you didn’t do this sooner.
Ingredient Notes
Key Ingredients
- Chicken Breasts: Bone-in, boneless, skin-on, or skinless—each has its charm. Skin-on is unbeatable for crispy goodness, while boneless is quicker.
- Aromatics: Garlic, onion, and fresh herbs like rosemary or thyme. These aren’t just optional—they’re essential for layering flavors.
- Vegetables: Classic choices like carrots and potatoes work wonders, but sweet potatoes, mushrooms, or parsnips bring a seasonal twist.
- Broth: Chicken or vegetable stock builds depth. For an elegant upgrade, splash in some dry white wine—it’s like a secret handshake for flavor.
- Seasonings: Salt and pepper are the basics. Paprika, cayenne, or even za’atar can elevate this dish depending on your mood.
Substitutions & Add-Ins
- Vegetarian? Swap chicken for tofu or tempeh, and add extra veggies.
- Love experimenting? Mushrooms, zucchini, or even fennel make great additions.
Kitchen Equipment Needed
- Dutch Oven: Enameled cast iron is the gold standard. If you don’t have one, consider it a worthy investment.
- Meat Thermometer: Precision equals perfection—165°F ensures juicy chicken every time.
- Tongs: Essential for flipping chicken without the mess.
- Cutting Board & Chef’s Knife: Prep tools you already love.
Step-by-Step Guide: How to Make Dutch Oven Chicken Breasts
Step 1: Prepping the Chicken
Generously season the chicken with salt, pepper, and spices—this is your foundation. If time allows, brining for a few hours adds an extra layer of juiciness.
Step 2: Searing the Chicken
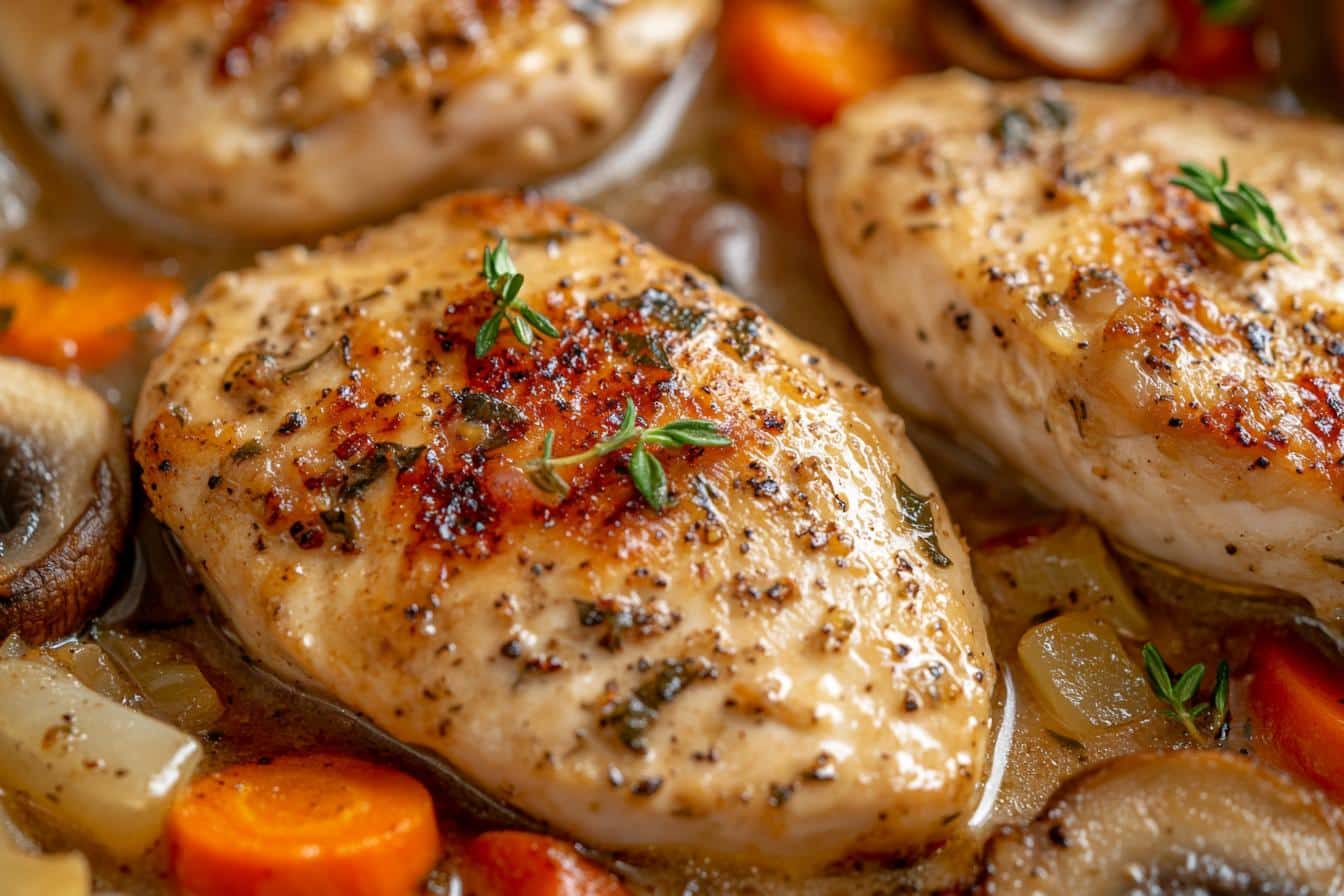
Heat a splash of oil in the Dutch oven until it’s shimmering. Sear the chicken until golden brown on both sides. Don’t rush this step! Searing locks in moisture and builds those irresistible crispy edges.
Step 3: Adding Aromatics and Veggies
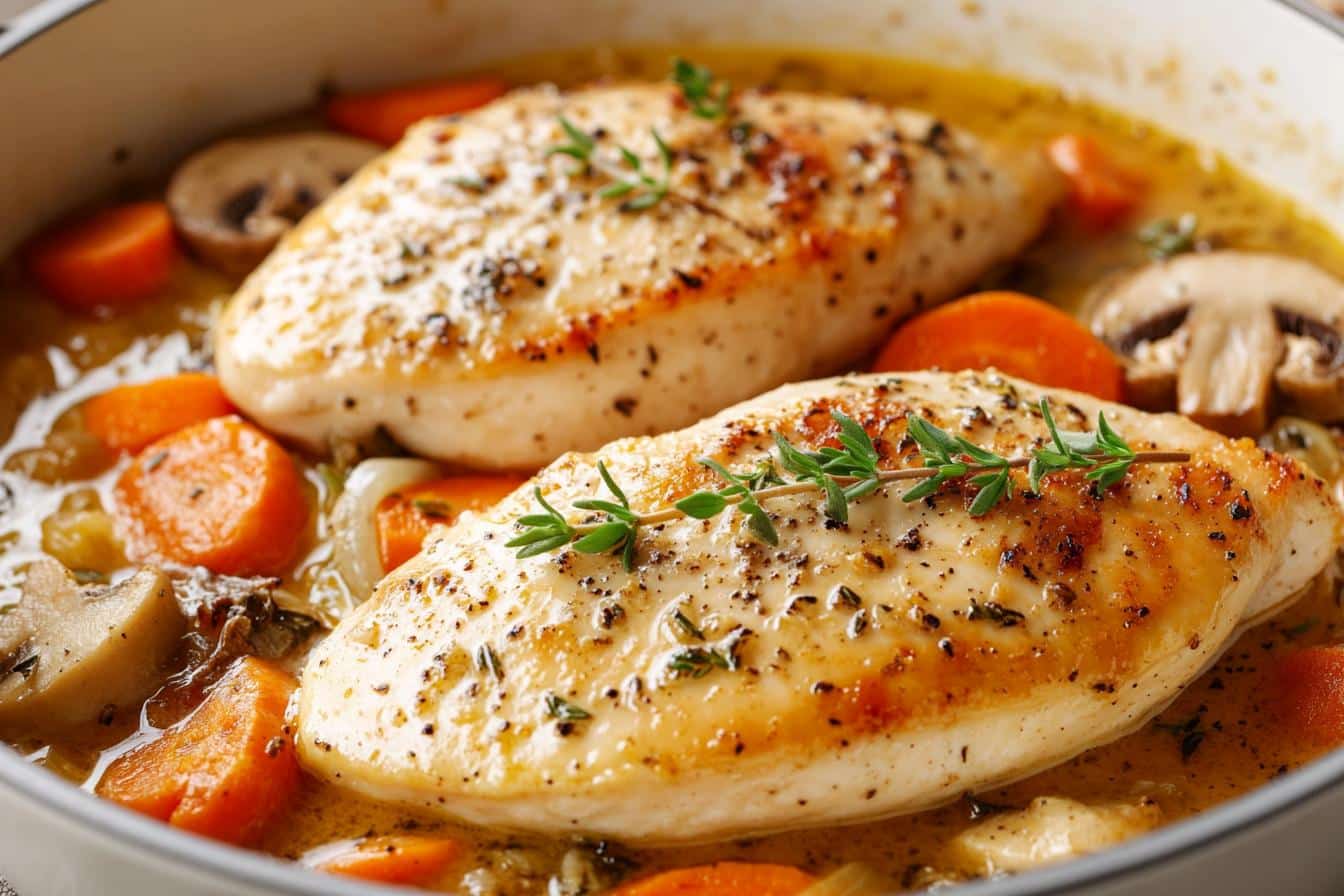
Add garlic, onions, and your chosen veggies. Let them mingle for a minute before deglazing with broth or wine. Scrape up those browned bits—flavor jackpot!
Step 4: Cooking in the Dutch Oven
Cover and bake at 375°F for 30-40 minutes. Adjust the timing based on the thickness of your chicken breasts. Bone-in takes longer, so keep that thermometer handy.
Step 5: Finishing Touches
Uncover the Dutch oven for the last 10 minutes if you want crispy skin. Add a squeeze of lemon or fresh herbs just before serving for a pop of brightness.
Cooking Tips & Techniques
- Use a Thermometer: This isn’t just for pros—it’s your secret to perfectly cooked chicken. Aim for 165°F.
- Tip: Searing before baking is non-negotiable for locking in moisture.
- Rest the Chicken: Let it rest for 5-10 minutes after cooking. It’s like letting it catch its breath—so worth it.
Recipe Variations
- Mediterranean: Add olives, sun-dried tomatoes, and oregano for a sunny vibe.
- Cajun: Amp up the spice with Cajun seasoning and throw in some sausage for flair.
- Asian-Inspired: Soy sauce, ginger, and sesame oil create a rich, aromatic profile.
Serving Suggestions
Pair this dish with crusty bread or fluffy rice to soak up all those savory juices. A light side salad with vinaigrette balances the meal beautifully.
Storage and Reheating Tips
- Refrigeration: Store in an airtight container for up to three days.
- Freezing: Freeze chicken with some broth to keep it moist during reheating.
- Reheating: Cover with foil and warm in the oven to preserve that tender texture.
Frequently Asked Questions
What’s a Dutch Oven, Anyway?
It’s the multitool of cookware—think even heat, moisture retention, and stovetop-to-oven versatility.
Can I Use Bone-In Chicken?
Yes! Just add an extra 5-10 minutes to the cooking time.
What’s the Secret to Moist Chicken?
Brine it. Use broth. Let it rest. It’s a three-step mantra for chicken nirvana.
This dish isn’t just a recipe—it’s an experience. With just a few simple steps, you’ll transform chicken breast from boring to brilliant. Give it a try, and soon enough, your Dutch oven might just become your favorite kitchen companion. Thanks for joining me on this flavor-packed journey—remember, cooking should always be fun and a little adventurous!
OTHER RECIPES YOU'LL LOVE

Dutch Oven Chicken Breast
Ingredients
For the Chicken:
- 4 bone-in skin-on chicken breasts (about 2 lbs total)
- 2 tablespoon olive oil or butter, if preferred
- 1 teaspoon kosher salt
- ½ teaspoon freshly ground black pepper
- 1 teaspoon smoked paprika
- ½ teaspoon garlic powder
For the Aromatics and Vegetables:
- 1 medium onion thinly sliced
- 3 garlic cloves minced
- 2 medium carrots peeled and cut into chunks
- 2 medium Yukon gold potatoes cut into quarters
- 2 sprigs fresh rosemary or 1 teaspoon dried rosemary
- 3 sprigs fresh thyme or 1 teaspoon dried thyme
- 1 cup low-sodium chicken broth
- ½ cup dry white wine optional, substitute with more broth if preferred
For Garnish:
- 1 tablespoon fresh parsley chopped
- Lemon wedges optional, for serving
Instructions
Preparation
- Preheat the Oven: Set your oven to 375°F (190°C).
- Season the Chicken: Pat the chicken breasts dry with paper towels. Rub with olive oil, then evenly sprinkle salt, pepper, smoked paprika, and garlic powder on all sides. Let sit while you prep the vegetables.
Searing the Chicken
- Heat the Dutch Oven: Place the Dutch oven on medium-high heat and add 1 tablespoon of olive oil. Once the oil is shimmering, carefully add the chicken breasts, skin-side down. Sear for 3-4 minutes until golden brown, then flip and sear for another 2 minutes. Remove the chicken and set aside on a plate.
Building Flavor
- Cook the Aromatics: Reduce the heat to medium and add the remaining olive oil. Toss in the sliced onion and garlic, sautéing for 2-3 minutes until fragrant and translucent.
- Add the Vegetables: Stir in the carrots, potatoes, rosemary, and thyme. Cook for another 3 minutes, letting the veggies soak up the flavorful base.
- Deglaze the Pot: Pour in the white wine, if using, and scrape the bottom of the Dutch oven with a wooden spoon to release browned bits (the flavor jackpot!). Let it simmer for 2 minutes to reduce slightly.
Cooking the Chicken
- Combine Everything: Return the chicken breasts to the pot, nestling them on top of the vegetables. Pour the chicken broth evenly over everything.
- Cover and Cook: Place the lid on the Dutch oven and transfer it to the preheated oven. Bake for 30-35 minutes, or until the internal temperature of the chicken reaches 165°F (74°C).
Finishing Touches
- Optional Crisping: For crispy skin, remove the lid during the last 10 minutes of cooking.
- Rest the Chicken: Remove the Dutch oven from the oven and let the chicken rest for 5 minutes.
Serving
- Sprinkle with fresh parsley and serve with lemon wedges for a burst of brightness. Plate the chicken with the roasted vegetables and spoon some of the flavorful broth over the top.
Leave a Reply