Lemme tell ya about the time I discovered the magic of Blackstone chicken wings. It was during last year's playoff season, and the boys were comin' over for the big game. My buddy Rick—you know, the one with the weird obsession with homemade hot sauce that'll melt your face off—bet me I couldn't make wings better than our local wing joint. Challenge ACCEPTED. After some trial and error (and one minor eyebrow singeing incident we don't talk about), I stumbled upon what I now consider the holy grail of chicken wing recipes. These Blackstone chicken wings are so dang crispy on the outside, juicy on the inside, and full of flavor that my wife actually asks for them on date night. DATE NIGHT, people! That's how you know they're good.
Why You'll Love This Recipe
- Science-backed crispiness: This ain't your average wing recipe! I'm using an overnight dry brine with a secret ingredient (spoiler: it's baking powder) that'll give you a crispy exterior that'll make your teeth sing.
- Flavor that'll knock your socks off: The dry brine and seasoning blend infuses these wings with flavor all the way through.
- Foolproof cooking method: Even if you're new to your Blackstone, this two-zone cooking method ensures perfect wings every dang time.
- Versatile for any sauce: While I've included my go-to buffalo sauce recipe, these wings can be dressed up with whatever floats your boat—from Asian-inspired to garlicky parmesan goodness.
Quick Recipe Preview
- Prep Time: 20 minutes active + 8-24 hours for dry brining
- Cook Time: 25-35 minutes
- Total Time: About 9-25 hours (mostly passive brining time)
- Servings: 4-6 hungry folks
Main Ingredients:
- Chicken wings
- kosher salt
- aluminum-free baking powder
- spices
- high smoke-point oil
The Science Behind the Crispiness
Okay, I'm gonna nerd out for a minute here, but stick with me because this is important stuff. The remarkable crispiness of these wings comes down to three key factors working together:
- Thoroughly drying the wings: Moisture is the enemy of crispiness! When I first started making these, I didn't dry the wings enough, and they steamed instead of searing. BIG mistake. Now I pat those babies bone-dry.
- Kosher salt dry brine: The salt draws out moisture through osmosis, which might sound counterintuitive, but trust me—it's crucial for that crispy exterior.
- Aluminum-free baking powder: This is the game-changer, folks. The baking powder (NOT baking soda—made that mistake once and my son still brings it up at family gatherings) raises the pH of the skin, which accelerates browning and creates this amazing micro-textured surface that becomes extraordinarily crispy when cooked.
My buddy Dave, who's an actual chef (unlike me, who just plays one in my backyard), explained that this combination creates a "synergistic effect" that prepares the wing surface for optimal crisping. I'm not exactly sure what "synergistic" means, but I DO know these wings are better than anything I've had at a restaurant.
Ingredients
For the Wings (Dry Brine & Prep):
- 3 lbs chicken wings (party style - drumettes and flats separated)
- 1 tablespoon Diamond Crystal kosher salt (or 1 ¾ teaspoons Morton kosher salt)
- 1 tablespoon aluminum-free baking powder (NOT baking soda!)
- 1 teaspoon garlic powder
- 1 teaspoon onion powder
- ½ teaspoon black pepper, freshly ground
- ½ teaspoon paprika (smoked or sweet)
For Cooking on the Blackstone:
- 2-3 tablespoons high smoke point oil (avocado oil is my go-to)
- 2 tablespoons unsalted butter (optional, but highly recommended)
For the Classic Buffalo Sauce:
- ½ cup Frank's RedHot Original Cayenne Pepper Sauce
- ½ cup (1 stick) unsalted butter, melted
- 1 tablespoon white vinegar (optional, for extra tang)
- ¼ teaspoon Worcestershire sauce
- ¼ teaspoon garlic powder
Step-by-Step Instructions
1. Prepare the Wings (8-24 hours before cooking)
First things first—you gotta plan ahead for these wings. The dry brining process is where the magic happens, and there's no rushing it!
- If your wings are whole, separate them into drumettes and flats. I save the wing tips for making stock because my wife says throwing them away is "wasteful." (She's right, but don't tell her I said that.)
- Pat those chicken wings DRY. Like, seriously dry. Use paper towels and be thorough. I can't emphasize enough how important this step is! Excess moisture = steam = soggy wings, and nobody wants soggy wings.
- In a large mixing bowl, whisk together the kosher salt, aluminum-free baking powder, garlic powder, onion powder, black pepper, and paprika.
- Add the wings to the bowl and toss 'em around until they're completely coated. Make sure every nook and cranny is covered!
- Arrange the wings in a single layer on a wire rack set inside a baking sheet. The rack is key here—it allows air to circulate around the entire wing.
- Place the baking sheet, uncovered, in the refrigerator for at least 8 hours. Overnight (up to 24 hours) is even better. This extended period lets the salt work its magic, drawing out moisture and allowing the baking powder to tenderize the skin.
2. Prepare for Cooking
- About an hour before you're ready to cook, take the wings out of the fridge and let them sit at room temperature. This helps them cook more evenly.
- If you're making the buffalo sauce (or any sauce), now's a good time to do it. For the buffalo sauce, melt the butter in a small saucepan over low heat, remove from heat, then whisk in the hot sauce and other ingredients. Set aside.
3. Cook the Wings on the Blackstone
This is where having a Blackstone really shines. The flat cooking surface gives you ultimate control and creates the perfect crispy exterior.
- Preheat your Blackstone griddle with two distinct heat zones: one at medium-high (400-450°F) for searing, and another at medium-low (325-350°F) for cooking through. If your griddle only has one zone control, start high and then reduce.
- Once the griddle is hot, spread a thin layer of oil on the cooking surface.
- Place the wings on the hotter zone, making sure they're not touching each other. Let 'em sear for about 5 minutes until they develop a nice golden-brown color.
- Flip the wings and sear the other side for another 5 minutes.
- Move the wings to the cooler zone (or reduce heat if using a single-zone griddle).
- Here's a pro tip: use a basting dome to cover the wings. This creates a convection-like environment that helps cook the wings evenly while maintaining that direct contact with the griddle for crispy skin.
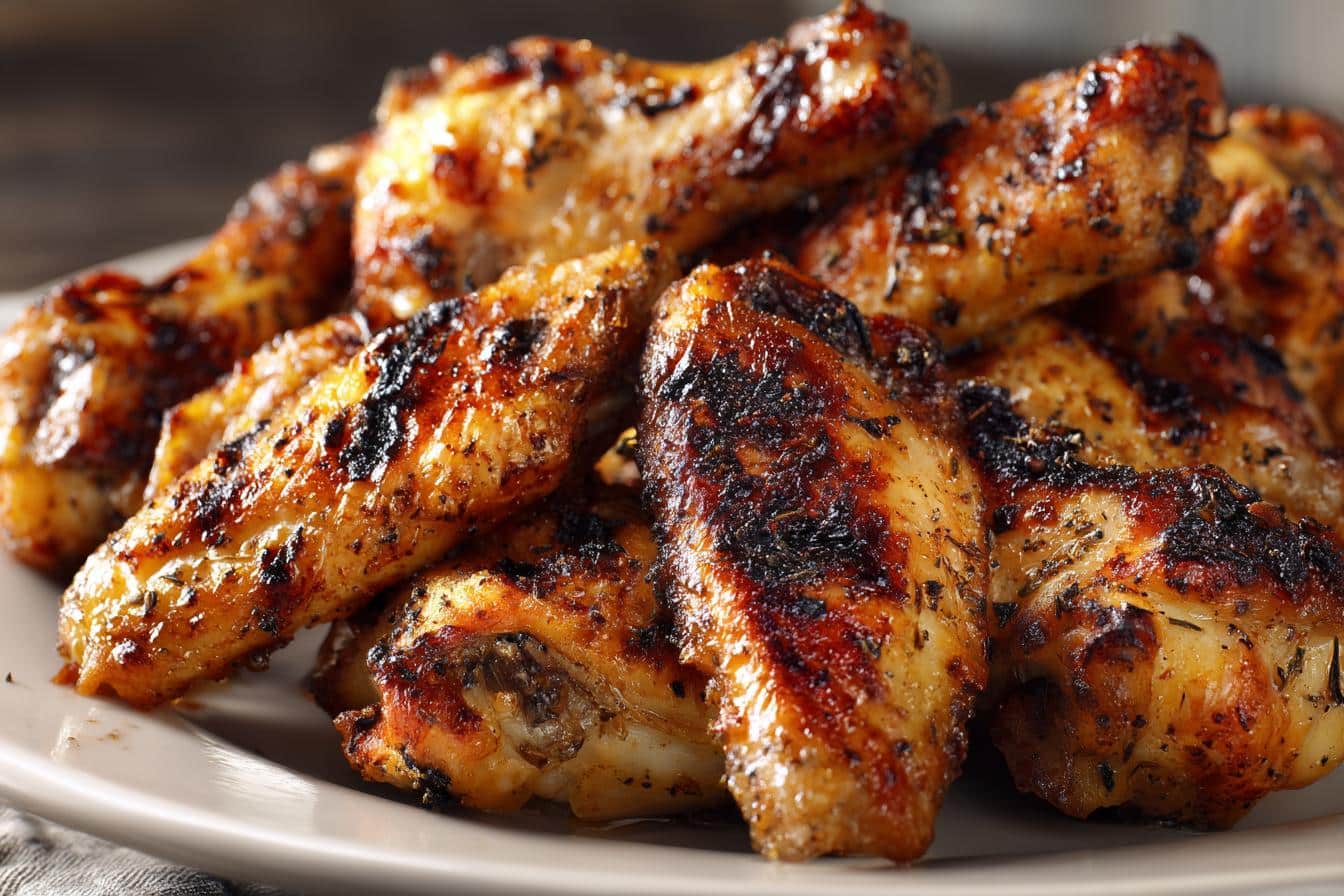
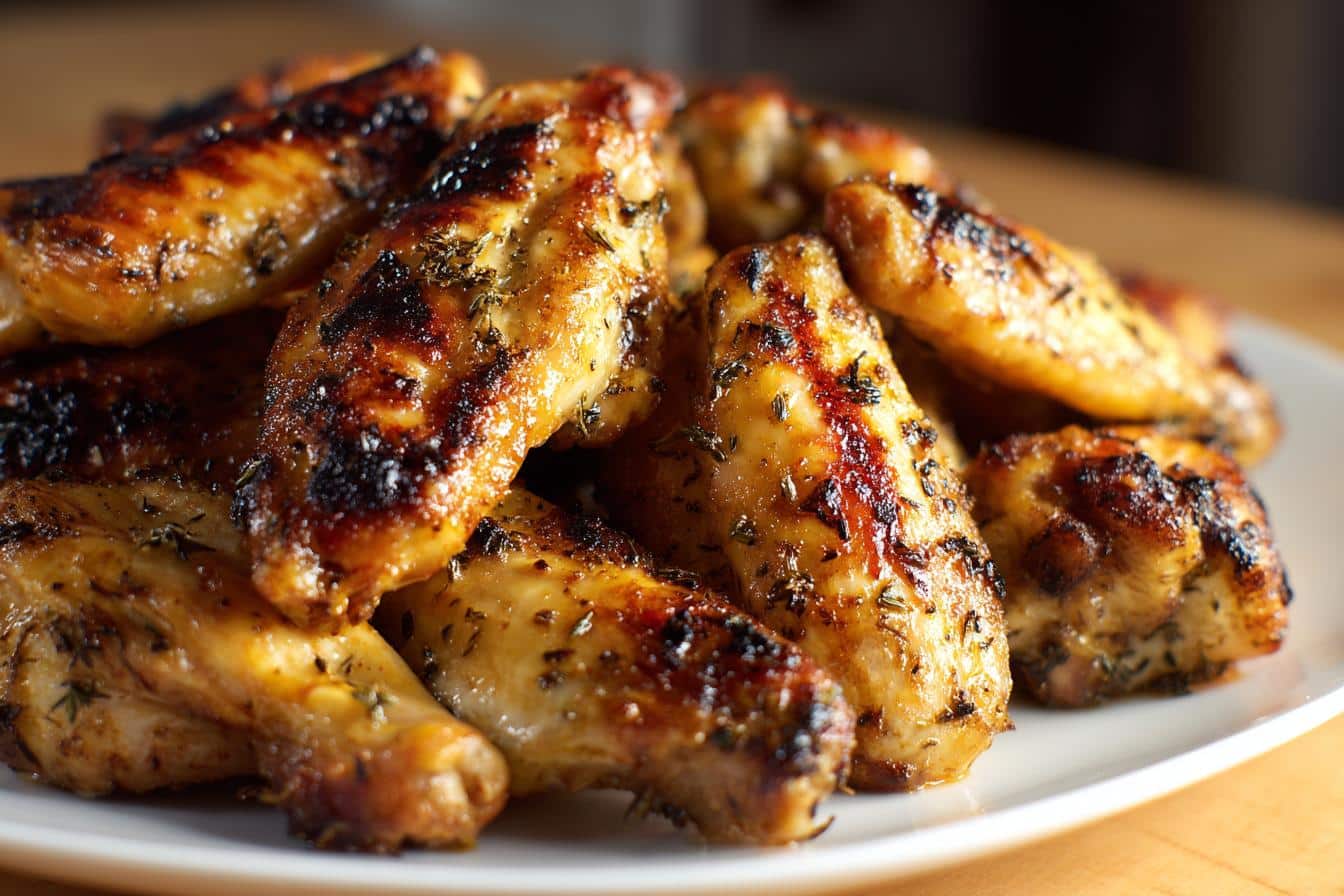
- Continue cooking, flipping occasionally, for about 15-20 more minutes, or until the internal temperature reaches 195-205°F. Yeah, that's higher than the "safe" 165°F, but trust me—at this temperature, the fat and collagen render beautifully, and the meat becomes incredibly tender while the skin gets extra crispy.
4. Sauce and Serve
- Once the wings are cooked to perfection, remove them from the griddle and immediately transfer to a large, clean mixing bowl.
- Pour your prepared sauce over the hot wings and toss gently until every wing is coated. Doing this while the wings are still hot helps the sauce adhere better.
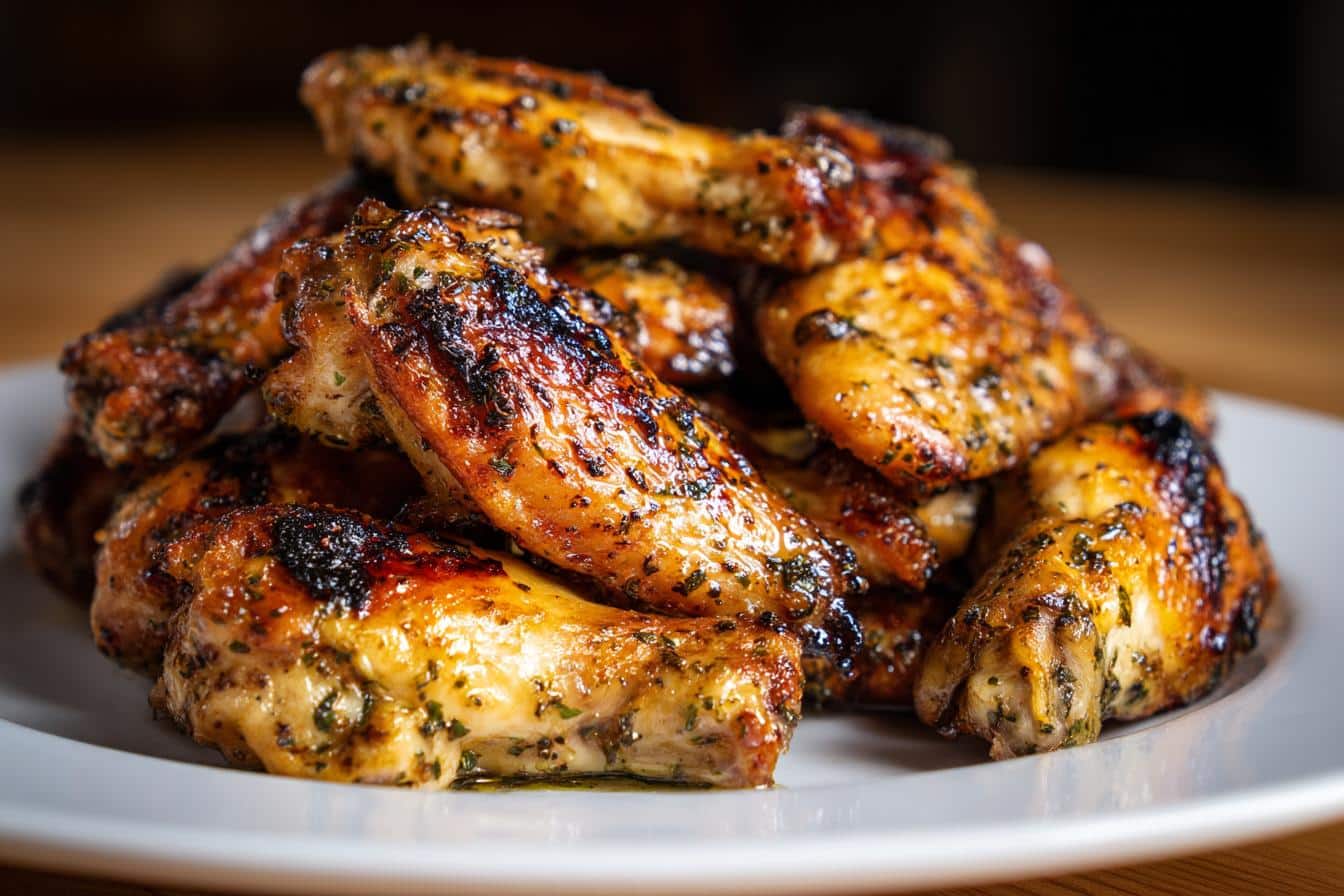
- Serve immediately with blue cheese or ranch dressing, celery, and carrot sticks.
Chef's Notes
- The Baking Powder Secret: Don't skip this! It's the cornerstone of achieving that exceptional crispiness. The science behind it is fascinating—it breaks down proteins in the skin and creates tiny bubbles that result in a lighter, crunchier texture.
- Temperature Matters: While chicken is safe at 165°F, taking wings to 195-205°F transforms them. The fat and collagen break down, making the meat fall-off-the-bone tender and contributing to even crispier skin.
- Dome it Up: That basting dome isn't just for show. It traps heat and creates a convection effect that cooks the wings evenly and quickly. Some folks in my grilling group swear it actually helps with faster crisping too.
- Dry = Crispy: I know I'm beating a dead horse here, but please, please, PLEASE dry those wings thoroughly before seasoning them. Surface moisture is the arch-nemesis of crispy skin.
Make-Ahead & Storage Tips
- Make-Ahead: The dry brining step is already a make-ahead process! Wing sauces can typically be prepared a day or two in advance and stored in the fridge.
- Storage: Leftover wings (if you have any—we never do) can be stored in an airtight container in the refrigerator for 3-4 days.
- Reheating for Crispiness: To revive leftover wings, use an air fryer at 375-400°F for 5-8 minutes. You can also reheat them right on the Blackstone at medium heat. Whatever you do, don't use the microwave unless you want sad, soggy wings.
Why This Works
- The Overnight Dry Brine: This multi-pronged approach creates wings with unparalleled crispiness. The thorough drying, salt-induced moisture extraction, and baking powder's pH-altering properties all work together to create a perfect crust.
- Two-Stage Temperature Cooking: Starting with high heat develops crucial color and texture, while finishing at a lower temperature ensures the inside cooks evenly without burning the outside. This approach, combined with cooking to a higher final internal temperature, results in tender, juicy meat with perfectly crisp skin.
- Saucing Off the Griddle: Many wing sauces contain sugars that can burn at high temperatures. Tossing the fully cooked wings in sauce after they're off the heat ensures the sauce doesn't burn and the hard-earned crispy texture stays intact.
Serving Suggestions
- Classic Accompaniments: Serve with celery and carrot sticks, plus blue cheese or ranch dressing for dipping.
- Side Dishes: These wings pair beautifully with crispy french fries, tater tots, or sweet potato fries if you're going all-in on finger foods.
- Creamy Contrast: A good coleslaw provides a cool, refreshing contrast to the rich, spicy wings.
Variations
Don't limit yourself to buffalo sauce! These wings can be dressed up in countless ways:
- Asian-Inspired: Mix soy sauce, honey, ginger, and garlic for a sticky-sweet alternative.
- Garlic Parmesan: Toss in melted butter, minced garlic, and grated Parmesan for a rich, savory option.
- BBQ Style: Use your favorite barbecue sauce for a classic crowd-pleaser.
- Lemon Pepper: Butter with fresh lemon juice and cracked black pepper creates a bright, zesty flavor.
FAQ
How long to cook chicken wings on Blackstone?
Typically 25-35 minutes total, with the first 10 minutes at medium-high heat for searing (5 minutes per side), and the remaining time at medium-low heat until they reach an internal temperature of 195-205°F.
What temp to cook chicken wings on Blackstone?
Start with a medium-high heat zone (400-450°F) for searing, then reduce to medium-low (325-350°F) to finish cooking through. This two-zone approach prevents burning while ensuring that the inside cooks perfectly.
How do I clean a Blackstone griddle?
After cooking, while the surface is still warm (but not hot), scrape off food debris with a metal spatula. Add water and use a grill stone or chainmail scrubber to remove stuck-on bits. Wipe clean with paper towels, then apply a thin layer of oil to protect the surface.
Ways to season chicken wings?
Beyond the basic recipe, experiment with different spice blends like cajun, Caribbean jerk, lemon pepper, or Italian herbs. You can also try adding different aromatics to the dry brine, such as citrus zest or crushed herbs.
OTHER RECIPES YOU'LL LOVE

Blackstone Chicken Wings
Ingredients
- 3 lbs chicken wings separated into drums and flats
- 1 tablespoon kosher salt
- 1 tablespoon aluminum-free baking powder
- 1 teaspoon garlic powder
- 1 teaspoon onion powder
- ½ teaspoon black pepper
- ½ teaspoon paprika
- 2-3 tablespoon high smoke point oil
- 2 tablespoon unsalted butter optional
Instructions
- Pat wings dry, then toss with salt, baking powder, and seasonings.
- Arrange on a wire rack over a baking sheet and refrigerate uncovered for 8-24 hours.
- Preheat Blackstone with two heat zones (medium-high and medium-low).
- Sear wings on medium-high for 5 minutes per side.
- Move to medium-low, cover with dome if available, and cook 15-20 more minutes until internal temp reaches 195-205°F.
- Toss immediately in desired sauce and serve.
Notes
- Use aluminum-free baking powder to avoid any metallic taste.
- The higher final temperature (195-205°F instead of just 165°F) results in more tender meat and crispier skin.
- Customize with your favorite sauce, but always toss the wings after they're fully cooked and off the heat.
I gotta say these Blackstone chicken wings have been a game-changer in my backyard cooking repertoire. From skeptical beginners to seasoned grillers, everyone who's tried this recipe has been blown away by the results. There's something deeply satisfying about watching your friends fight over the last wing and knowing YOU made that happen!
The beauty of this recipe isn't just in the incredible taste and texture—it's in the process. Standing in front of that griddle, cold beer in hand, watching those wings transform into crispy golden perfection... that's my happy place, folks.
JJ says
Heck of a recipe, very happy with the outcome. Thanks for sharing and thanks for your service!