Let me tell you about Dutch oven nachos—the culinary revelation that transformed my camping game forever. Last summer at Lake Tahoe, while my kids splashed in the water, my buddy Mike wrestled with his fishing rod (for the third hour straight), and my wife "read" her novel (actually watching Mike's fishing comedy show), I assembled my nacho masterpiece. Sturdy tortilla chips, perfectly seasoned beef, layers of cheese—and when I lifted that cast iron lid 15 minutes later? The entire campsite descended on our fire pit like a pack of hungry wolves who'd just discovered filet mignon.
The Dutch Oven: Not Just Your Grandma's Cooking Pot
These legendary pots date back to the 1700s when Pennsylvania Dutch settlers (who were actually German—historical mislabeling at its finest) brought them to America. Cowboys, pioneers, and wilderness chefs quickly adopted them for three game-changing reasons:
- Perfect Heat Distribution — The thick cast iron walls eliminate hot spots, ensuring every chip gets equal treatment. I learned this lesson through a traumatic camping incident involving a thin aluminum pot and what I optimistically called "chili" in Yellowstone. My friend Dave has commemorated this culinary disaster in our camping group's unofficial history as "The Great Charred Bean Catastrophe of 2015."
- Incredible Heat Retention — These iron beasts hold heat like a grudge. I've pulled my Dutch oven off coals and served warm nachos an hour later. Try matching that with your ultralight titanium cookware!
- Unmatched Versatility — Campfire, charcoal, home oven, grill, or even emergency cooking during power outages—Dutch ovens handle it all. During last year's three-day blackout, my neighbor Tom slurped lukewarm ramen by flashlight while we feasted on fully loaded nachos. His expression when I brought over a heaping plate wasn't just gratitude—it was pure enlightenment.
PRO TIP: To maintain your Dutch oven's seasoning (that beautiful non-stick patina), never wash it with soap, and always dry thoroughly after cleaning to prevent rust. A well-maintained Dutch oven becomes a family heirloom that actually gets better with age—unlike my camping jokes, according to my teenagers.
Building the Perfect Nacho Foundation
Listen up—chip selection can make or break your Dutch oven nachos. You need sturdy, thick chips that can withstand the weight of toppings without disintegrating into sad, soggy fragments. At my son's 13th birthday campout, I foolishly used those paper-thin restaurant-style chips. The result? A bizarre tortilla soup that prompted one kid to ask if we were having "Mexican cereal." Critical lesson learned.
For cheese, skip the pre-shredded bags with their anti-caking agents (cellulose, potato starch) that prevent proper melting. Five extra minutes of hand-shredding delivers exponentially better results:
- Best Melting Cheeses:
- Medium or sharp cheddar (base flavor)
- Monterey Jack (melting champion)
- Pepper Jack (adds heat without jalapeños)
- Colby (milder option for kid-friendly batches)
My wife swears by adding a small handful of Mexican queso quesadilla cheese for stretch factor—the satisfying cheese pull that makes everyone fight for the gooiest portions.
The Art of Layering
After 47 nacho failures (I've been keeping count), I've cracked the code to structurally sound nachos that would make an engineer proud:
- Base Layer: Sturdy chips arranged with minimal overlap
- Cheese Shield: Light layer of cheese to create a moisture barrier
- Pre-Cooked Proteins: Seasoned meats or beans that can withstand heat
- Hardy Veggies: Corn, peppers, pre-cooked onions
- Cheese Dome: Generous top layer that binds everything together
- Wet Toppings: Tomatoes, olives near the top (not directly on chips)
My camping buddy Carlos, a third-generation Mexican-American chef, taught me this critical technique: "Keep wet ingredients away from direct chip contact, or you'll create nacho quicksand." The man speaks nacho truth—I'm not too proud to acknowledge wisdom when I hear it.
NACHO ARCHITECTURE 101: Think of your nachos as a building—you need a solid foundation (chips), structural supports (cheese), and proper weight distribution (heavier ingredients toward the top). This isn't just cooking; it's edible engineering.
Playing With Fire (Safely, Because I'm Not An Idiot)
Before diving deeper into nacho nirvana, let's talk safety because third-degree burns put a serious damper on s'mores hour.
Always build your fire in designated fire rings or pits, maintaining at least 15 feet distance from tents, overhanging branches, and anything remotely flammable. This rule crystallized for me when a stray ember created a perfect circular hole in my $80 camping chair. My wife now refers to it as "the $80 lesson in fire safety."
CRUCIAL EQUIPMENT:
- Heat-resistant gloves rated for at least 500°F
- Lid lifter or pliers for Dutch oven handling
- Level, cleared area for setting down hot cookware
My cousin Eddie learned about proper heat protection the hard way—his forearm now features a permanent Dutch-oven-shaped reminder that cast iron reaches temperatures of 400-700°F during cooking. (Sorry, Aunt Marge, but repeated warnings were ignored!)
Coal Power: Not Just for Santa's Naughty List
For precision cooking that rivals your home kitchen, you need temperature control. The magic number for perfect nachos is 350°F, achieved with approximately 25 charcoal briquettes. The distribution formula:
- 17 coals on top (⅔ of total)
- 8 coals underneath (⅓ of total)
This seemingly uneven distribution accounts for how heat travels through cast iron and creates the ideal cooking environment. For smaller Dutch ovens, use this formula: 2 coals on bottom and 2 on top for every inch of oven diameter.
A charcoal chimney starter ($15-20 at camping stores) is essential for properly prepared coals. Attempting to cook over a roaring campfire is like trying to bake cookies with a flamethrower—technically possible but unnecessarily challenging and likely to end with carbonized results.
TEMPERATURE GUIDE BY COAL COUNT:
- 325°F: 21 coals (14 top/7 bottom)
- 350°F: 25 coals (17 top/8 bottom)
- 375°F: 29 coals (19 top/10 bottom)
- 400°F: 33 coals (22 top/11 bottom)
Nacho Average Tips
After 15+ years of Dutch oven nacho experimentation (and several questionable batches), I've compiled these non-negotiable rules:
- The Rotation Dance: Every 5-10 minutes, give your Dutch oven a quarter turn clockwise while rotating the lid counterclockwise. This prevents hot spots and ensures even cooking. My wife calls this my "nacho tango" and claims I look like I'm performing some strange ritual. She's not entirely wrong.
- DRAIN ALL CANNED INGREDIENTS: This bears repeating in all caps because it's that important. Excess liquid creates nacho soup, not nacho greatness. My first attempt had the consistency of a bizarre tomato-cheese stew because I dumped in undrained beans and corn. My teenager still references this disaster whenever he questions my competence: "Are you sure, Dad? Remember the nacho flood of 2010?"
- Heavy-Duty Foil Lining: This simple step separates nacho masters from novices. The difference between a 3-minute cleanup and a 30-minute scraping session is a single sheet of foil. I once spent an entire hour chiseling burnt cheese while everyone else enjoyed campfire stories. Don't be like Past Me—line that pot!
- Fresh Toppings After Cooking: Cilantro, raw onions, jalapeños, and avocado should never see the inside of a hot Dutch oven. Heat transforms these ingredients from crisp, flavorful accents to sad, wilted shadows. Add them post-cooking for maximum impact.
- Layer Testing: Insert a knife between layers halfway through cooking. If it comes out with melted cheese, your nachos are progressing perfectly. If still solid, you need more time or heat.
The Cleanup Crew
If you heeded my foil advice, cleanup should take approximately 90 seconds—just lift out the foil and you're done! If not (or if a catastrophic foil breach occurred), here's the proper method for cleaning without destroying your Dutch oven's seasoning:
- Scrape out food residue with wooden or plastic tools (never metal!)
- Rinse with hot water (NO SOAP—I'm looking at you, brother-in-law Mike who nearly ruined my 10-year seasoning at Yosemite)
- For stubborn bits, use coarse salt as an abrasive with a soft cloth
- Heat dry the Dutch oven on low heat to eliminate moisture
- Apply thin coat of vegetable oil while still warm
- Store with paper towel inside to absorb any moisture
A properly maintained Dutch oven develops a natural non-stick surface that improves with each use. My oldest Dutch oven is approaching 20 years of service and produces nachos so non-stick they practically leap onto plates.
Dutch oven nachos transcend mere campfire food—they're memory-makers, conversation starters, and community builders disguised as a simple meal. From the mountains of Colorado to the beaches of Florida, this recipe has never failed to create moments that outlast the campfire's glow.
OTHER RECIPES YOU'LL LOVE

Dutch Oven Nachos
Ingredients
- 1 pound ground beef 80/20 for optimal flavor/fat ratio
- 1 tablespoon olive oil
- 1 packet taco seasoning or homemade mix of cumin, chili powder, garlic powder, onion powder, oregano
- 12 ounces thick restaurant-style tortilla chips
- 1 15 ounce can black beans rinsed and drained
- 1 cup corn kernels fresh or canned—DRAINED!
- 1 ½ cups cheddar cheese freshly shredded
- 1 ½ cups Monterey Jack cheese freshly shredded
- 1 15- ounce can diced tomatoes drained
- 1 4- ounce can black olives sliced
- ¼ cup red onion finely diced
- 1 jalapeño thinly sliced (seeds removed for less heat)
- ¼ cup fresh cilantro chopped
- Sour cream for serving
- Salsa for serving
- Guacamole for serving
Instructions
- In a skillet over your campfire or camp stove, brown the ground beef with olive oil. Add the taco seasoning and a splash of water (about ¼ cup). Simmer until water evaporates, approximately 5 minutes. Drain excess fat.
- Line your 12-inch Dutch oven with heavy-duty foil, extending it over the edges for easy removal. This step saves you from scrubbing cheese remnants by headlamp later.
- Create a base layer with half the tortilla chips, arranging them in a single layer with minimal overlap for structural integrity.
- Sprinkle 1 cup of mixed cheeses evenly over the chips. This creates your critical moisture barrier.
- Add remaining chips for your second layer, creating slight peaks and valleys for toppings to nestle into.
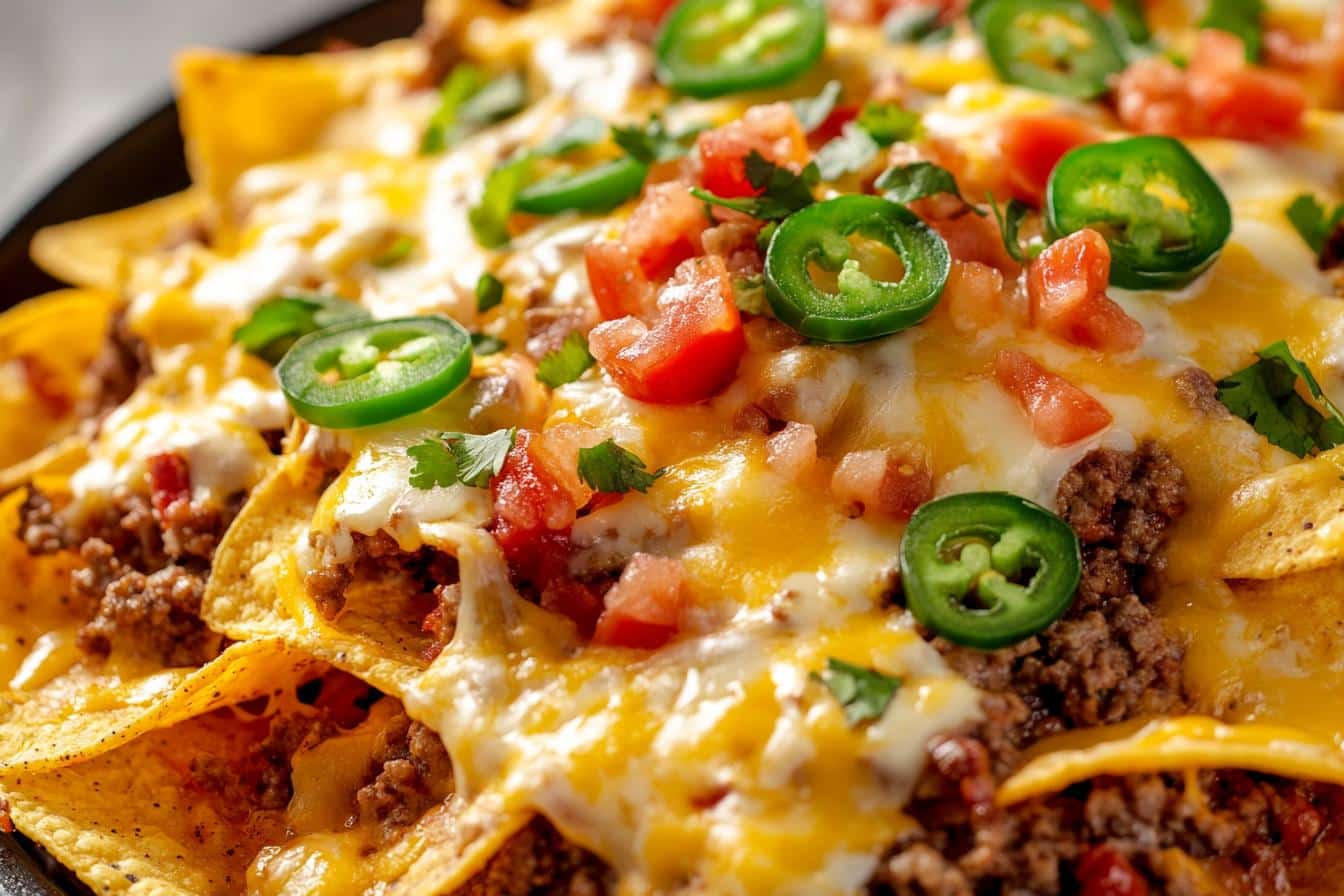
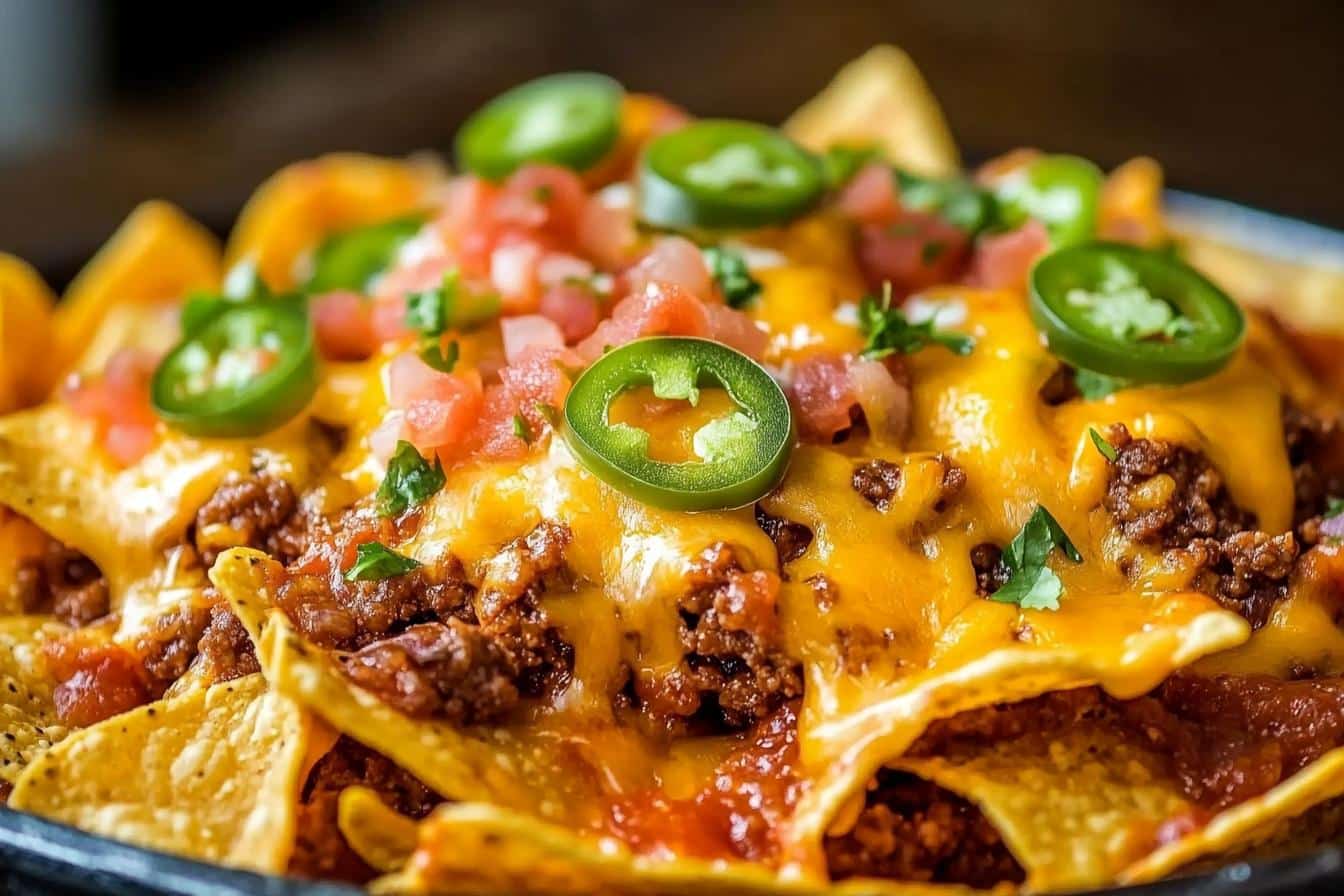
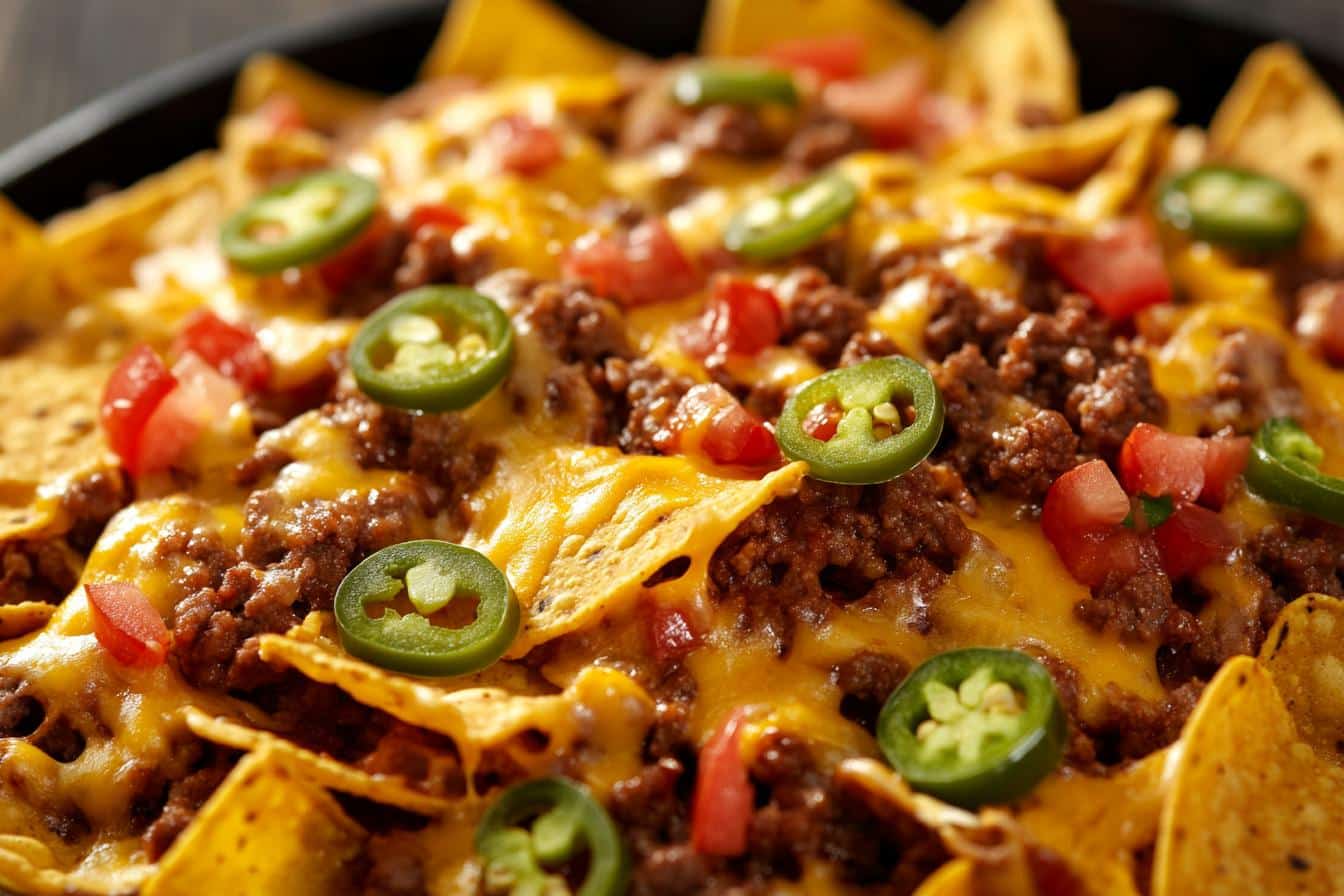
- Distribute your toppings in this order: ground beef, black beans, corn, drained tomatoes, and olives.
- Blanket everything with remaining cheese, ensuring complete coverage to create a protective cheese dome.
- Cover with lid and place over prepared coals—approximately 8 coals underneath and 17 on top to achieve 350°F.
- Cook for 15 minutes, rotating the Dutch oven and lid in opposite directions every 5 minutes for even heating. Check for completely melted cheese and heated-through ingredients.
- Remove from heat and top with fresh ingredients: red onion, jalapeño slices, and chopped cilantro.
- Serve with sour cream, salsa, and guacamole in separate containers for customization.
Leave a Reply