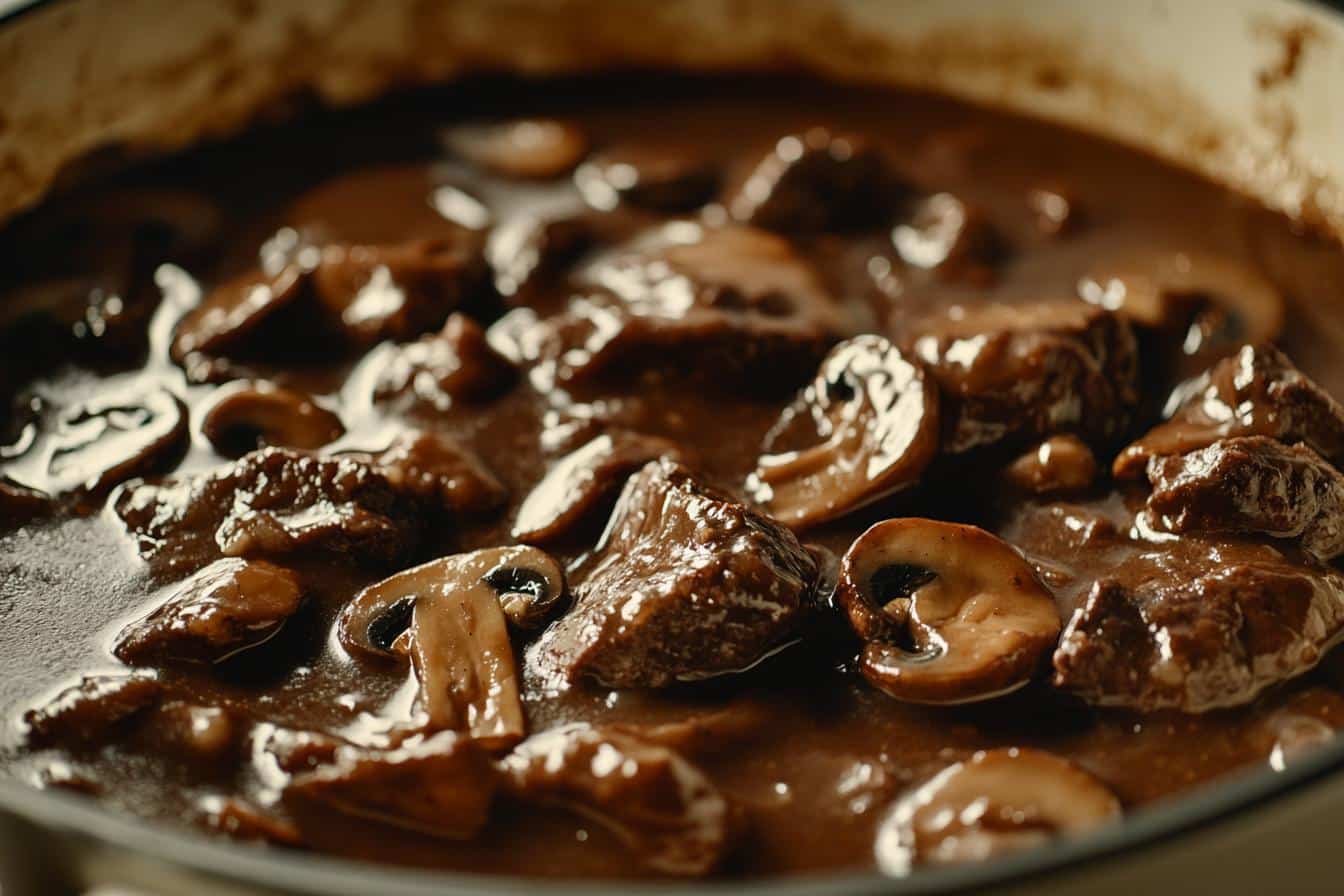
Picture this: It's a chilly Sunday evening. The windows are foggy from the heat inside your kitchen. There's a rich, savory aroma wafting through your home that makes everyone who enters immediately ask, "What are you cooking?" That, my friends, is the magic of a perfectly executed Dutch oven braised beef with mushrooms – meltingly tender chunks of beef bathed in a deeply savory sauce enriched with red wine and earthy mushrooms.
I've been obsessed with perfecting this dish for years. After countless Sunday dinners (and a few memorable disasters that my brother-in-law still won't let me forget), I've finally cracked the code on what makes this classic so exceptional when done right. This isn't just any beef stew recipe – it's an optimized version that addresses all those common frustrations like tough meat, watery sauce, and soggy mushrooms that have probably haunted your previous attempts.
Drawing inspiration from both classic French Boeuf Bourguignon and hearty American beef stews, this recipe combines the most successful techniques I've gathered from professional chefs and home cooks alike. The result? A fool-proof method for creating a dish that's impressive enough for company but comforting enough for a family meal. Even better? It actually tastes more amazing the next day, making it the perfect make-ahead meal for busy households or entertaining.
Quick Recipe Preview
In a hurry? Here's the highlight reel of what we're making. (For precise measurements and detailed instructions, just scroll down to the complete recipe card.)
Key Ingredients:
- Boneless Beef Chuck Roast
- Bacon/Pancetta
- Yellow Onion
- Carrots
- Celery
- Garlic
- Tomato Paste
- Dry Red Wine
- Beef Broth
- Fresh Thyme
- Bay Leaves
- Cremini Mushrooms
- Pearl Onions
Simplified Steps:
- Sear & Sauté: Crisp bacon, then deeply sear seasoned beef chuck cubes in batches. Sauté onions, carrots, celery until softened; add garlic, tomato paste, and flour.
- Deglaze & Simmer: Pour in red wine, scraping up browned bits (fond). Add broth, herbs, return beef/bacon, and bring to a simmer.
- Braise Low & Slow: Cover tightly and braise in a 325°F (160°C) oven until beef begins to tenderize (approx. 2 hours).
- Add Veggies & Finish: Sauté mushrooms and pearl onions separately until well-browned. Add to pot and continue braising uncovered/ajar until beef is completely fork-tender and sauce thickens (45-60 min more). Rest, skim fat, garnish, and serve.
Ready for the full deep-dive? Keep reading for my essential Chef's Notes explaining the secrets to ultimate tenderness, why certain steps matter, troubleshooting common issues, and the complete, printable recipe card at the end!
Recipe Overview
What Makes This Version Special
After years of testing (and occasionally serving my family what could only be described as "beef-flavored chewing gum in brown water"), I've pinpointed exactly what makes the difference between an okay beef stew and an extraordinary one:
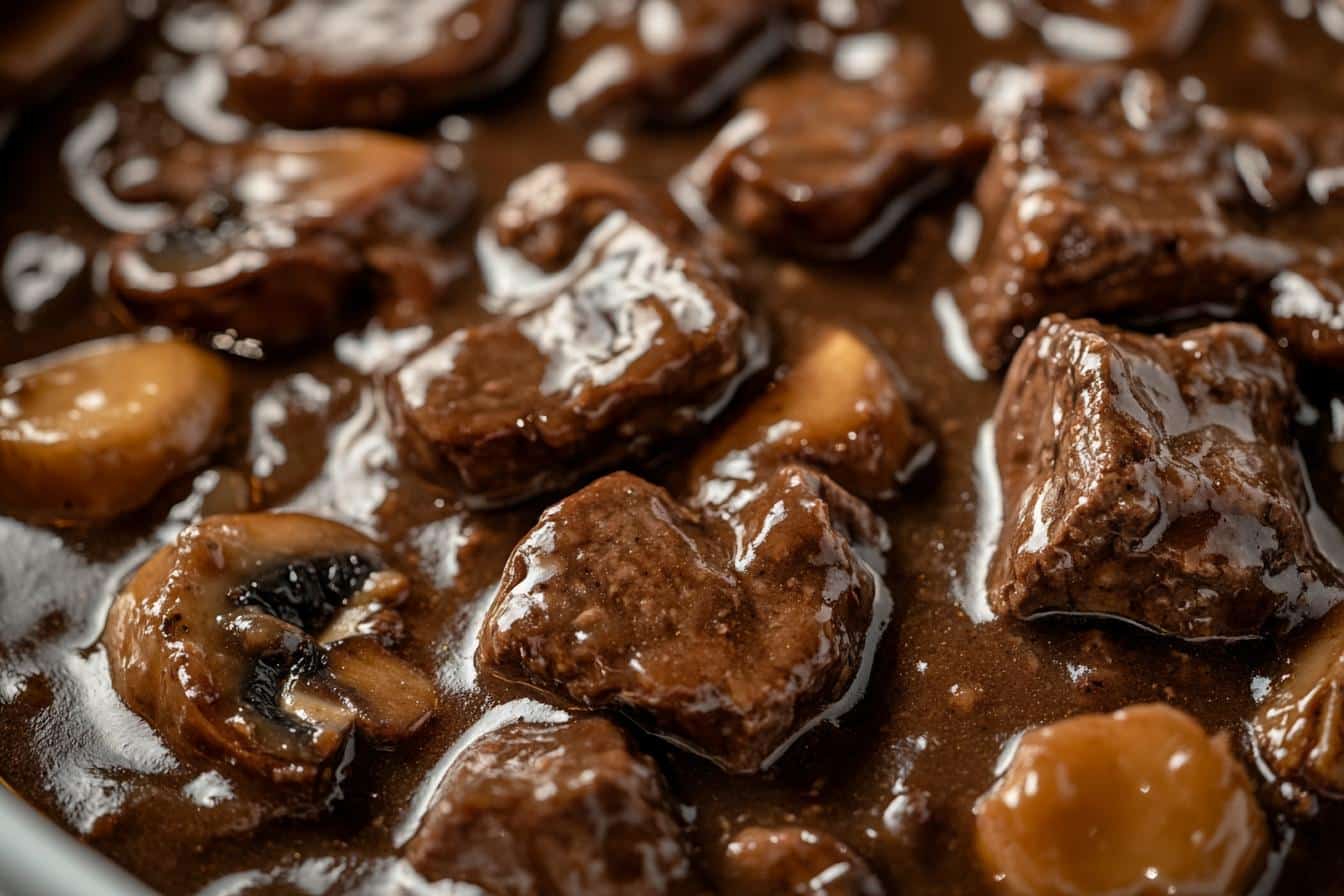
- Unbeatable Tenderness: The choice of chuck roast and the specific low-and-slow braising method breaks down collagen effectively, giving you meat that practically melts in your mouth.
- Incredible Depth of Flavor: Built methodically through deep searing, properly cooked aromatics and tomato paste, effective deglazing, and optional umami boosters that take this from "pretty good" to "what is IN this?!"
- Perfectly Textured & Flavored Mushrooms: The separate sautéing technique prevents the soggy, rubbery mushrooms that plague so many stews. Trust me, even mushroom skeptics will be converted.
- Rich, Non-Greasy Sauce: Through correct thickening, reduction, and fat skimming, you'll get a sauce that's luxurious without being heavy.
- Ideal for Make-Ahead: Like a fine wine, this dish actually gets better with age (well, a day or two). The flavors meld and deepen beautifully overnight.
Time Commitment
Let's be honest about the time investment:
- Prep: ~45 minutes (chopping, measuring, getting organized)
- Cook: ~3.5 hours (mostly passive oven time)
- Total: ~4 hours 15 minutes
Yes, it's a project, but I promise it's worth every minute. Plus, most of that time is hands-off, leaving you free to binge-watch your favorite show or take a well-deserved nap.
Special Equipment
- Heavy-bottomed 6-7 quart Dutch oven with tight lid (This is non-negotiable, folks – the even heat distribution is crucial)
- Large skillet (for properly cooking those mushrooms)
- Standard kitchen tools (tongs, wooden spoons, measuring cups, sharp knife, etc.)
Ingredient Overview
The star of the show is chuck roast, which offers the perfect balance of flavor, tenderness when properly cooked, and affordability. For the wine, you want something dry and full-bodied that you'd actually enjoy drinking – Burgundy, Pinot Noir, Cabernet Sauvignon, or Merlot are all excellent choices. (And yes, you'll have some leftover to enjoy with dinner!)
For mushrooms, cremini (baby bella) offer more flavor than button mushrooms but are still widely available. If you're feeling fancy, a mix of wild mushrooms would be divine.
Don't worry if you need substitutions – I've got you covered in the Chef's Notes section for everything from gluten-free options to an alcohol-free version.
Make-Ahead & Storage
Here's a little secret: this dish is BETTER the next day. The flavors deepen and marry overnight in a way that's almost magical. To store, cool it completely (don't rush this step), then refrigerate in an airtight container for 3-5 days. The beauty of chilling? Any excess fat rises to the top and solidifies, making it super easy to remove before reheating.
For longer storage, freeze for up to 3 months. Reheat gently on the stovetop or in a 300°F oven until warmed through.
Nailing the Sear & Mushrooms: Critical Techniques
Achieving a Deep, Flavorful Sear
The sear isn't just for looks – it's the foundation of your stew's flavor. When you brown meat properly, you're initiating the Maillard reaction, a complex chemical process that creates hundreds of new flavor compounds. Skip this step (or rush it), and you're leaving flavor on the table.
Here's how to nail it:
- Thoroughly dry the beef with paper towels – moisture is the enemy of browning
- Season before searing – contrary to some old advice, this helps develop a better crust
- Use adequate heat (medium-high) – too low and you'll steam the meat; too high and you'll burn it
- Work in batches – overcrowding causes steaming instead of searing
- Be patient – resist the urge to move the meat until a deep brown crust forms
I learned this the hard way at a dinner party where I rushed the searing step. The resulting pale, insipid stew haunts me to this day (as do my friend Mike's comments about it).
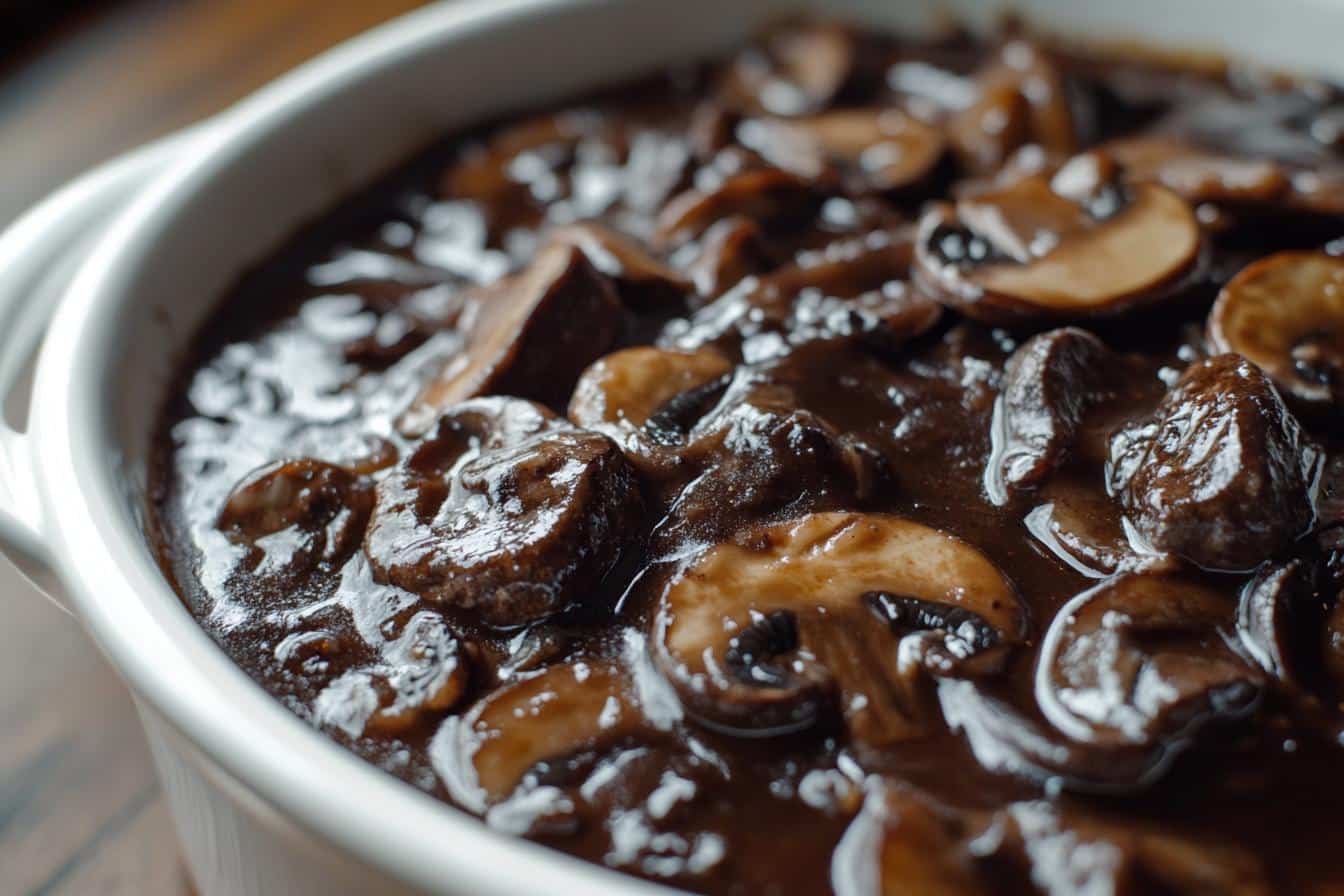
Mushroom Mastery: Browned, Not Boiled
Ever wondered why your mushrooms turn out soggy and flavorless? It's because mushrooms are like little sponges, containing up to 90% water. When you crowd them in a pan, they release this water and basically steam in their own liquid.
The optimized method:
- Use hot fat (butter/oil) in a large skillet over medium-high heat
- Cook in small batches – seriously, don't crowd them
- Let water release and fully evaporate before browning begins
- Achieve deep browning on all sides
- Season only after browning – adding salt too early draws out more moisture
- Add to stew during the last hour of cooking
When I serve this stew to guests, the properly browned mushrooms always get comments. My neighbor (who claimed to hate mushrooms) actually asked for seconds and the recipe after trying this version.
Troubleshooting and FAQs
Q1: Help! My beef is still tough.
A: It needs more time cooking low and slow. Don't increase heat! Ensure sufficient liquid and cover tightly. Patience is key for collagen breakdown. The meat will tell you when it's ready – if you have to work to cut it with a fork, keep cooking.
Q2: My sauce seems watery.
A: Remove the lid and braise uncovered/ajar for the last 45-60 mins to reduce. If still thin, simmer gently on the stovetop or thicken carefully with a cornstarch slurry (mix 1 tablespoon cornstarch with 2 tablespoon cold water) or beurre manié (equal parts soft butter and flour mashed together). Just add a little at a time to avoid over-thickening.
Q3: Why are my mushrooms rubbery/soggy?
A: You likely overcrowded the pan or added them too early. Remember, mushrooms need space and high heat to release their water and then brown. Cook them separately in batches until deeply golden before adding near the end of the cooking time.
Q4: Can I skip the red wine?
A: Yes. Substitute with more low-sodium beef broth plus 1-2 tablespoon red wine vinegar or balsamic vinegar for acidity. You'll lose some depth of flavor, but it will still be delicious.
Q5: What's the best beef? Is pre-cut stew meat okay?
A: Boneless chuck roast is best for tenderness and flavor. Avoid pre-cut "stew meat" if possible; it's often a mystery mix of different cuts that cook inconsistently. Cutting your own 1.5-2 inch cubes yields better results and is worth the extra few minutes.
Q6: Can I use a slow cooker?
A: Yes, but always sear the beef and sauté aromatics on the stovetop first for flavor. Transfer to the slow cooker, adjust liquid slightly (use about 25% less), and cook on Low for 7-9 hours or High for 4-6 hours. The sauce may need thickening at the end.
Q7: Can I add potatoes or other vegetables?
A: Absolutely! Add cubed potatoes, parsnips, or rutabaga during the last 1-1.5 hours. For greens like kale, stir them in during the last 10-15 minutes until wilted.
Q8: How do I make this gluten-free?
A: Skip the all-purpose flour. Thicken the sauce via reduction or a cornstarch slurry at the end. Ensure your broth and any condiments (Worcestershire/soy sauce) are certified GF. Adding a packet of unflavored gelatin bloomed in some of the broth can also add body without gluten.
Serving and Pairing
This rich, luxurious stew deserves worthy accompaniments. My personal favorites:
- Creamy mashed potatoes (the ultimate sauce vehicle)
- Buttery egg noodles (tossed with a bit of parsley)
- Crusty artisan bread (for sopping up every last drop of sauce)
- Soft polenta (particularly good with the mushrooms)
For a lighter touch, serve with roasted root vegetables or a simple green salad with a bright vinaigrette.
For beverages, the rule is simple: serve the same wine you used in cooking (or something similar). A Belgian Dubbel or dark lager also works beautifully if you're more of a beer person.
For dessert, keep it simple – an apple crumble, pear tart, or chocolate pots de crème provide the perfect finish without overwhelming your palate after such a rich main course.
Chef's Notes
- The Champion Chuck: Why This Cut Wins
Chuck roast comes from the shoulder area, a well-worked muscle group rich in connective tissue (collagen) and intramuscular fat (marbling). During long, moist cooking, this collagen breaks down into gelatin, which tenderizes the meat fibers and enriches the braising liquid. Leaner cuts like sirloin or round lack sufficient collagen and fat, tending to dry out with prolonged cooking. Cutting chuck into larger cubes (1.5-2 inches) helps prevent the meat from drying out during cooking. - The Secret to Tenderness: Low, Slow & Steady
Tough meat almost always results from insufficient cooking time or excessive heat. The transformation of tough collagen into tender gelatin is a function of both time and temperature. Gentle, consistent heat (ideally with the braising liquid between 185°F/85°C and 195°F/90°C) is required for several hours. Rushing with higher heat causes muscle fibers to contract and squeeze out moisture. Trust the process - the beef is ready when it yields easily to a fork or shreds with minimal pressure. - Building Flavor Layers
Exceptional stew relies on building flavor at each stage. Deeply searing the well-dried beef creates complex, savory notes through the Maillard reaction. Cooking aromatics until softened and lightly caramelized adds sweetness. Briefly cooking tomato paste intensifies its umami character. Thoroughly deglazing with wine lifts the flavorful browned bits (fond) from the bottom of the pot. Consider adding umami boosters like Worcestershire, soy sauce, or fish sauce to enhance meaty flavor without being individually detectable. - Mushroom Mastery
Cook cleaned, cut mushrooms in batches in a hot skillet with fat over medium-high heat. Do not overcrowd the pan, and allow mushrooms to release their water completely before browning. Season only after browning, as salt draws out water and hinders browning. Add these properly cooked mushrooms during the last 30-60 minutes of braising to allow them to absorb some sauce flavor while retaining their texture. - Sauce Science: Achieving Perfect Consistency
Several factors contribute to a properly textured sauce. Coating the aromatics with flour provides initial thickening. The meat should be mostly but not completely submerged during braising. Cooking uncovered during the final hour allows for natural reduction and concentration. If still too thin, simmer gently on the stovetop or thicken with a cornstarch slurry or beurre manié (equal parts soft butter and flour). Skimming excess fat results in a cleaner sauce. - The Make-Ahead Advantage
This dish tastes even better the day after it's made. Resting overnight allows flavors to fully meld and deepen. The meat may also reabsorb some moisture as it cools in the sauce. To store, cool completely, then refrigerate for up to 3-5 days. Chilling also solidifies the surface fat, making it easy to remove before reheating. It freezes well for up to 3 months. - Variations & Substitutions
No Alcohol: Replace red wine with equal amount of additional beef broth, plus 1-2 tablespoons of red wine vinegar or balsamic vinegar.
No Bacon: Omit and use 2-3 tablespoons of olive oil for searing.
Mushroom Preferences: Use other varieties like shiitake or portobello, or omit entirely.
Vegetable Additions: Add parsnips, rutabaga, turnips, or hearty greens like kale.
Broth Choice: Low-sodium chicken broth can yield a lighter but still flavorful result.
Gluten-Free: Omit flour and thicken via reduction or cornstarch slurry at the end.
There's something deeply satisfying about mastering a dish that relies on patience and technique rather than fancy ingredients or complicated methods. This optimized Dutch oven braised beef and mushrooms delivers exceptional results by focusing on what truly matters: proper searing, low and slow cooking, and strategic addition of ingredients.
Whether you're serving it at a dinner party or enjoying it as a family meal on a cold winter night, this recipe promises the kind of memorable dining experience that keeps people coming back for more. The best part? With each batch you make, you'll develop an even better understanding of the process, allowing you to customize it to your preferences.
I'd love to hear how this recipe turns out for you! Did you try any substitutions or additions? What did you serve alongside it? Drop a comment below and let me know how it went.
OTHER RECIPES YOU'LL LOVE

Dutch Oven Braised Beef And Mushroom
Ingredients
For Searing & Aromatics:
- 5 ounces thick-cut bacon or pancetta cut into ½-inch dice
- 3 pounds boneless beef chuck roast well-marbled, trimmed of large fat caps and gristle, cut into 1.5- to 2-inch cubes
- 2 tablespoons olive oil plus more if needed
- 2 medium yellow onions about 1 lb total, chopped
- 3 medium carrots about 10 oz total, peeled and chopped
- 2 medium celery ribs chopped
- 4-6 large garlic cloves minced or smashed
- 2 teaspoons kosher salt such as Diamond Crystal; use less if using table salt, plus more to taste
- 1 teaspoon freshly ground black pepper plus more to taste
For the Braising Liquid & Flavor:
- 2 tablespoons all-purpose flour
- 2 tablespoons tomato paste
- 1 bottle 750 ml / approx. 3 cups dry, full-bodied red wine (such as Burgundy, Pinot Noir, Cabernet Sauvignon, or Merlot)
- 3 cups low-sodium beef broth
- 4-5 sprigs fresh thyme
- 2 bay leaves
- Optional Umami Boosters: 1 tablespoon Worcestershire sauce; 1 tablespoon soy sauce or 1 teaspoon fish sauce; ½ oz dried porcini mushrooms rehydrated; 1 packet (¼ oz) unflavored gelatin bloomed in broth
- Optional Deglazing Booster: ¼ cup Cognac or brandy
For the Mushrooms & Finishing:
- 1 tablespoon unsalted butter
- 1 tablespoon olive oil
- 1-1.5 pounds cremini mushrooms or button mushrooms, cleaned and quartered (or halved if small)
- 8-10 ounces frozen pearl onions thawed
- Optional: 1 pound baby Yukon Gold or red potatoes scrubbed and halved or quartered if large
- Optional: 1 cup frozen peas
- 2 tablespoons chopped fresh flat-leaf parsley or chives for garnish
Instructions
- Prep Ingredients: Ensure beef cubes are thoroughly patted dry with paper towels; this is crucial for achieving a good sear. Prepare all vegetables and aromatics as described in the ingredients list. Have liquids measured and herbs ready. Preheat oven to 325°F (160°C) with a rack positioned in the lower third.
- Cook Bacon: Place the diced bacon in the cold Dutch oven. Cook over medium heat, stirring occasionally, until the bacon is crisp and the fat has rendered, about 8-10 minutes. Using a slotted spoon, transfer the crispy bacon to a paper towel-lined plate, leaving the rendered fat in the Dutch oven.
- Sear Beef: Increase the heat under the Dutch oven to medium-high. Season the dried beef cubes generously with 1.5 teaspoons of the kosher salt and 0.5 teaspoon of the black pepper. Carefully add about half of the beef to the hot fat in a single layer, ensuring not to overcrowd the pan. Sear the beef, without moving the pieces for several minutes per side, until a deep brown crust forms on at least two sides, about 5-7 minutes total per batch. Add olive oil if the pot becomes dry. Transfer the seared beef to the plate with the bacon. Repeat with the remaining beef, adding more oil if necessary.
- Sauté Aromatics: Reduce the heat to medium. Add the chopped onions, carrots, and celery to the pot. Cook, stirring occasionally with a wooden spoon, until the vegetables soften and the onions are translucent and lightly golden, about 6-8 minutes. Add the minced or smashed garlic and cook, stirring constantly, until fragrant, about 1 minute.
- Add Tomato Paste & Flour: Stir in the tomato paste and cook, stirring constantly, for 1-2 minutes, allowing it to darken slightly and coat the vegetables. Sprinkle the flour over the vegetables and stir constantly for another 1-2 minutes to cook out the raw flour taste.
- Deglaze & Add Liquids: Pour in the red wine (Optional: Add Cognac/brandy first, let it bubble for a minute before adding wine). Increase the heat to medium-high and bring the wine to a simmer. Scrape the bottom of the pot vigorously with the wooden spoon to dislodge any browned bits (fond) stuck to the bottom. Let the wine simmer and reduce by about one-third, about 3-5 minutes. Stir in the beef broth, thyme sprigs, and bay leaves. Add the remaining 0.5 teaspoon salt and 0.5 teaspoon pepper. (Optional: Stir in Worcestershire, soy/fish sauce, or rehydrated porcini liquid now).
- Braise Beef: Return the seared beef and reserved bacon (and any accumulated juices) to the pot. The liquid should come about halfway up the sides of the meat or just barely cover it; add a bit more broth if needed, but avoid drowning the meat. Bring the mixture back to a gentle simmer on the stovetop. Cover the pot tightly with the lid and carefully transfer it to the preheated 325°F (160°C) oven. Braise for 2 hours.
- Cook Mushrooms & Pearl Onions: About 30 minutes before the initial 2-hour braise is complete, prepare the mushrooms and onions. Heat the butter and 1 tablespoon olive oil in the large skillet over medium-high heat until the butter is melted and foaming. Add the mushrooms in a single layer (work in batches if necessary to avoid crowding). Cook undisturbed for 3-5 minutes, until deeply browned on the first side. Stir and continue cooking, stirring occasionally, until browned all over and any liquid released has evaporated, about 5-10 minutes total. Season the mushrooms with salt and pepper after they have browned. Add the thawed pearl onions to the skillet and cook, stirring occasionally, until lightly browned and heated through, about 5 minutes. Remove the skillet from the heat and set aside.
- Add Vegetables & Finish Braising: After the beef has braised for 2 hours, carefully remove the Dutch oven from the oven. Check the beef for tenderness; it should be starting to yield easily to a fork. Stir in the cooked mushrooms and pearl onions. If using potatoes, add them to the pot now. Ensure the vegetables are mostly submerged in the liquid. Return the pot to the oven without the lid (or with the lid slightly ajar) to allow the sauce to reduce and thicken. Continue to braise for another 45 to 60 minutes, or until the beef is completely fork-tender and shreds easily, and the potatoes (if using) are cooked through.
- Finish & Serve: Carefully remove the Dutch oven from the oven. Tilt the pot and use a large spoon to skim off any excess fat that has risen to the surface. Fish out and discard the bay leaves and thyme sprigs. If using frozen peas, stir them in now; the residual heat will cook them quickly. Taste the sauce and adjust seasoning with additional salt and pepper if needed. Let the stew rest, uncovered, for 10-15 minutes before serving; this allows the flavors to meld and the meat to relax. Ladle the stew into warm bowls, garnish generously with chopped fresh parsley or chives, and serve immediately.
Leave a Reply